Android, NodeJS, Openshift, Twilio
DevEnglish

Ahoy-hoy !
Duration of this tutorial : >2h hours
What will you learn
At the end of this lesson you’ll be able to develop, sign and package an Android application that communicates with a Node.JS application deployed on Openshift cloud provider, that serves SMS via Twilio’s API
This is a step by step tutorial, I try to cover every single operation from folders’ creation to packaging.
.
Required Skills
No need to be an expert, but at least you need some Java background, I’ll take you by the hand, if needed.
Required softwares
- Latest JDK 1.8 (version used : 1.8_u72)
- Latest Android Studio IDE (version used : 1.5.1)
- Latest Node.JS (version used : 4.2.4) : /
- GIT command line (version used : 1.9.4.msysgit.2)
- An Android smartphone with USB debug activated (or patience if you use the emulator)
Objectives
- Develop an Android application and package it
- Develop and deploy a (very simple) Node.JS API to Openshift servers
- Use Twilio’s API for sending SMS
Android application
Project creation
First create somewhere a folder where all the tutorial will be done, as we will need several directories
mine is D:\DEV\AndroNode_tuto
Launch Android studio:
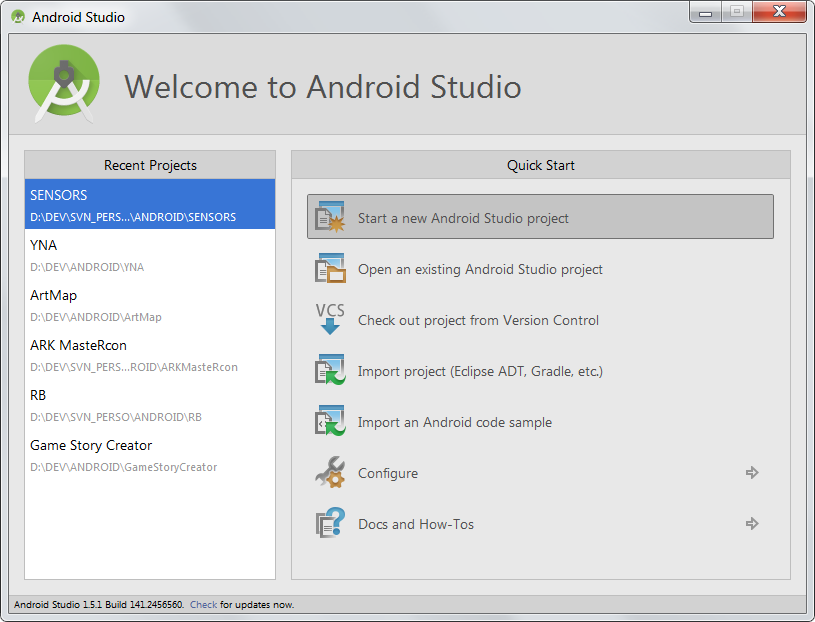
Application’s name: Get an answer
Company name: quidquid.fr
Package name : fr.quidquid.andronode
Project location: D:\DEV\AndroNode_tuto\Android_app
Adapt with your own parameters… and click Next
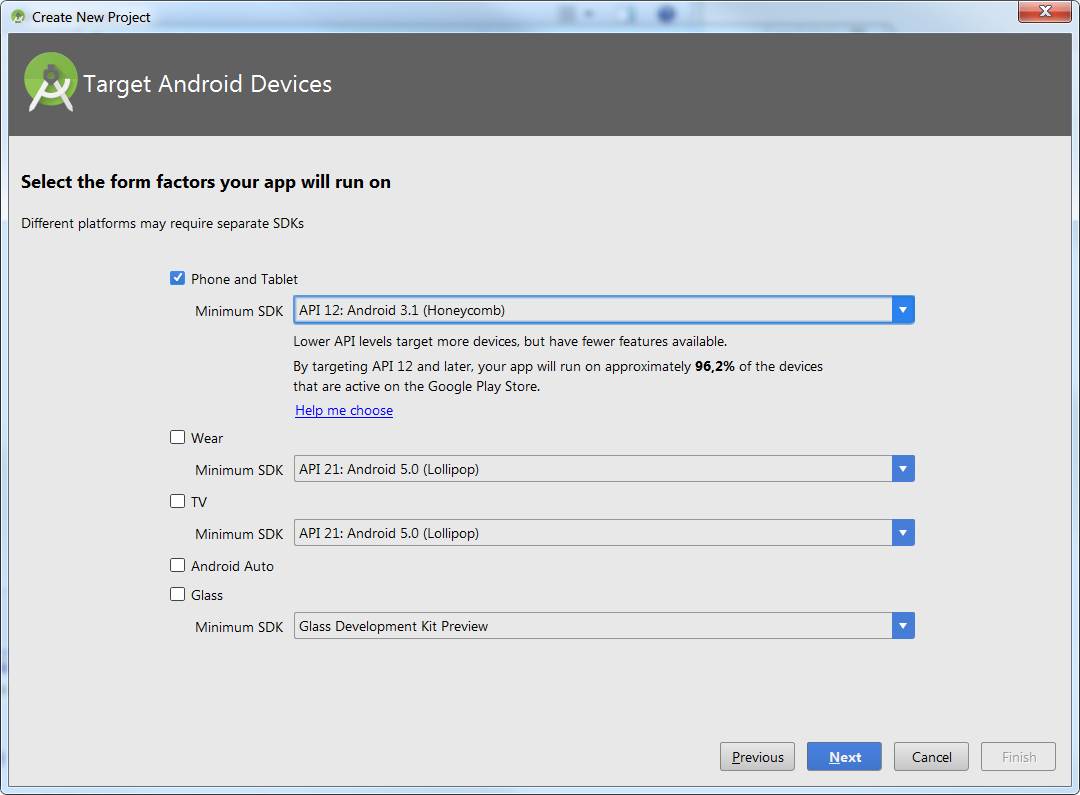
Choose the android version you want to support, that mostly depends on some component you could use which would be only available starting from a specific Android version, in our case we’ll start from the version 12….
click Next
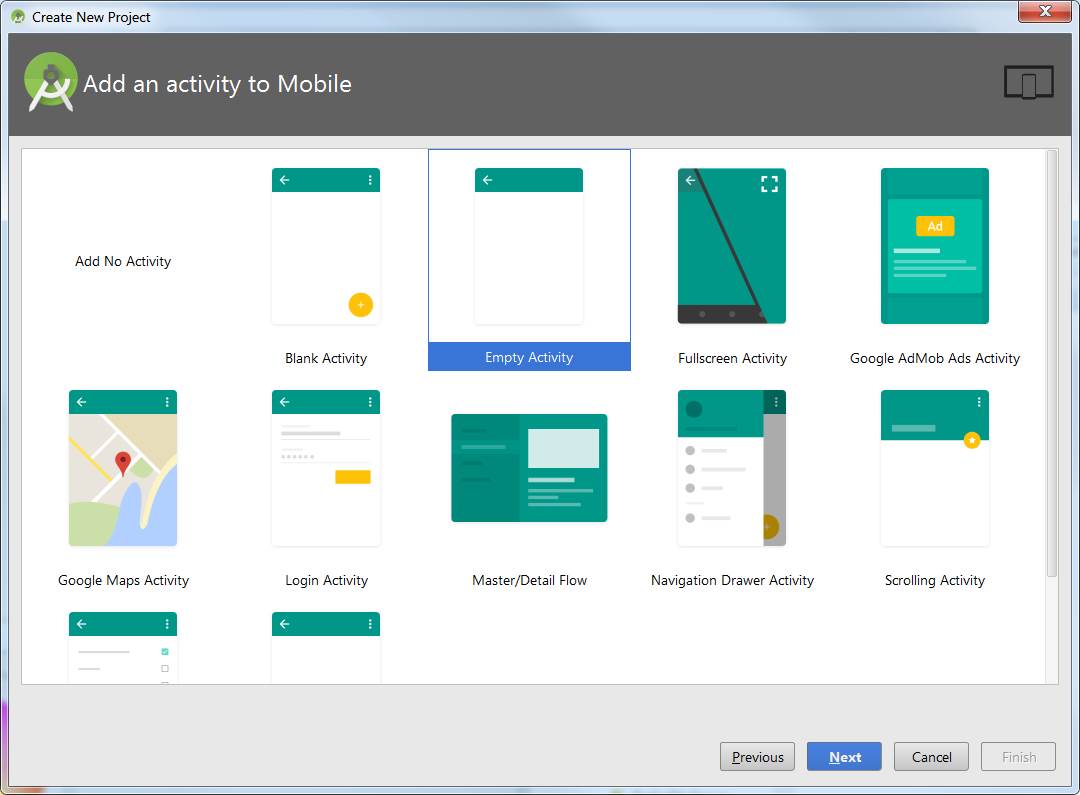
Choose the empty activity, this time we’ll do all the work ourselves…
click Next
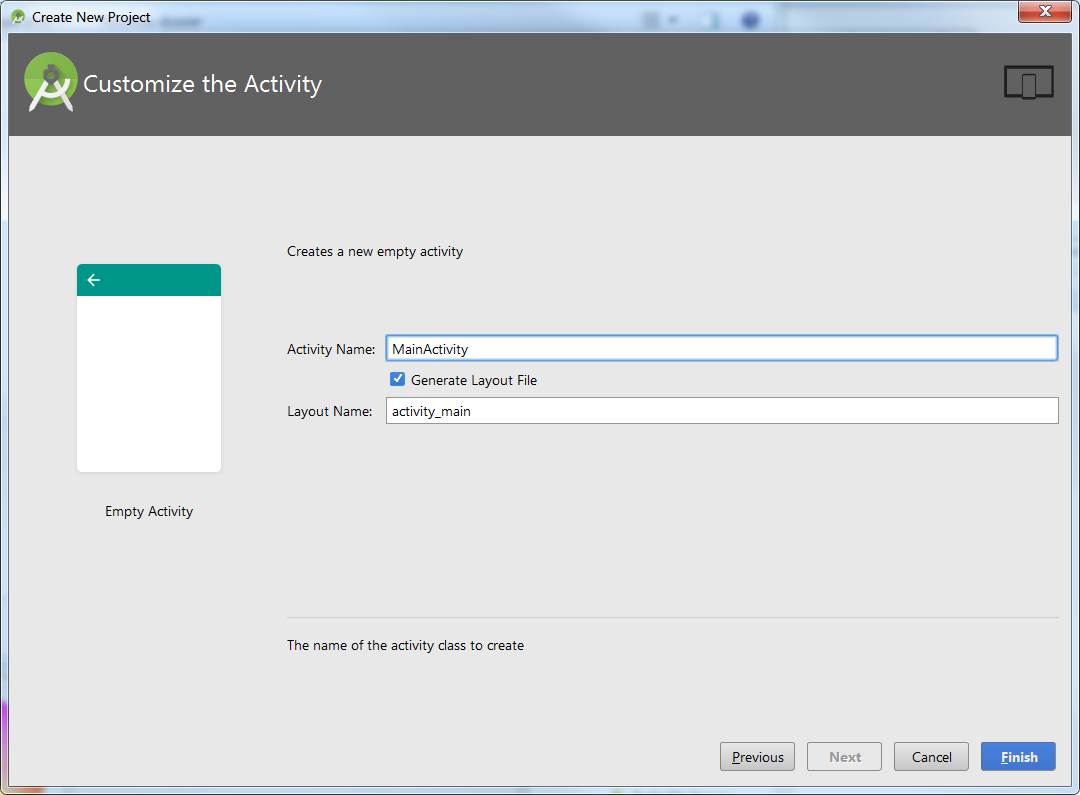
And click Finish
Android studio asks you to sync your gradle project… do it and wait until it’s over.
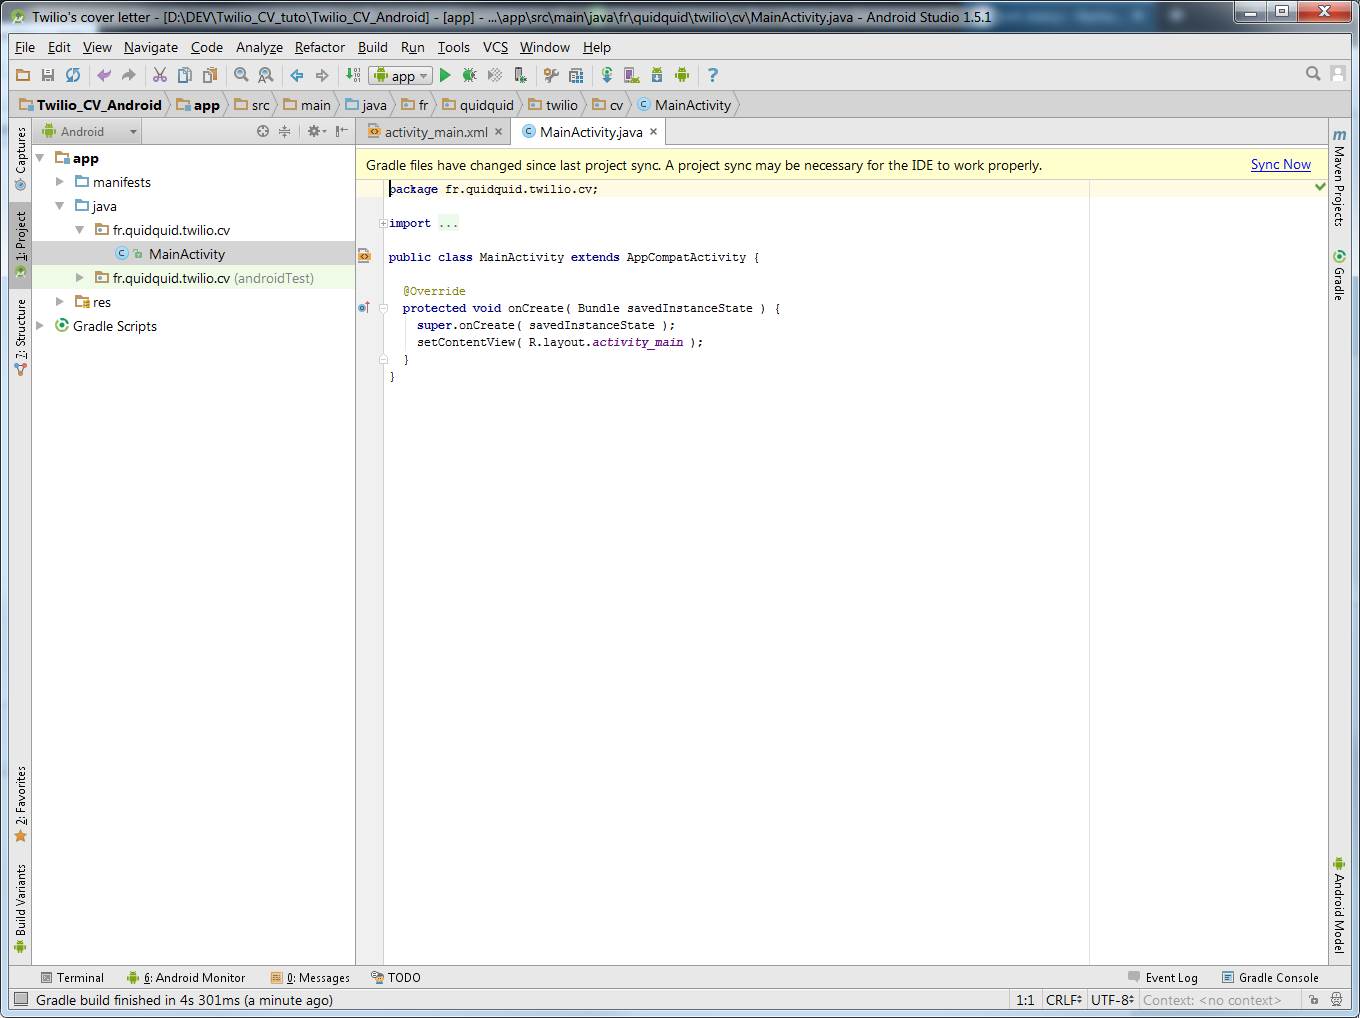
Now let’s code !
Development process of this tutorial:
- Creating the GUI
- Developing the NodeJS server
- Deploy the server onto Openshift
- Implement the logic and the server connections from our Android app
- Package
Before creating the views we’ll change the AndroidManifest.xml file by adding permissions and changing the default theme :
<?xml version="1.0" encoding="utf-8"?>
<manifest
    package="fr.quidquid.andronode"
    xmlns:android="http://schemas.android.com/apk/res/android">

    <uses-permission android:name="android.permission.INTERNET"/>
    <uses-permission android:name="android.permission.ACCESS_NETWORK_STATE"/>

  <application
      android:allowBackup="true"
      android:icon="@mipmap/ic_launcher"
      android:label="@string/app_name"
      android:supportsRtl="true"
      android:theme="@style/Theme.AppCompat.NoActionBar">
    <activity android:name=".MainActivity">
      <intent-filter>
        <action android:name="android.intent.action.MAIN"/>
        <category android:name="android.intent.category.LAUNCHER"/>
      </intent-filter>
    </activity>
  </application>
</manifest>
Open the app/res/layout/activity_main.xml file and we add our components
A – a toolbar (Title and buttons if we need some) : android.support.v7.widget.Toolbar
B – a fragment container that will hold our views : FrameLayout android:id="@+id/fragment_container"
<?xml version="1.0" encoding="utf-8"?>
<LinearLayout
    xmlns:android="http://schemas.android.com/apk/res/android"
    xmlns:tools="http://schemas.android.com/tools"
    android:layout_width="match_parent"
    android:layout_height="match_parent"
    android:orientation="vertical"
    tools:context="fr.quidquid.andronode.MainActivity">

  <android.support.v7.widget.Toolbar
      android:id="@+id/lyt_toolbar"
      xmlns:app="http://schemas.android.com/apk/res-auto"
    android:layout_width="match_parent"
    android:layout_height="?attr/actionBarSize"
    android:background="?attr/colorPrimary"
    app:popupTheme="@style/ThemeOverlay.AppCompat.Light" />

  <FrameLayout
        android:id="@+id/fragment_container"
        xmlns:android="http://schemas.android.com/apk/res/android"
        android:layout_width="fill_parent"
        android:layout_height="fill_parent"/>

</LinearLayout>
Now we are going to create the fragment view for our first login screen and right after we’ll modify our MainActivity.java file to see the first results.
Right click on the folder res/layout and choose New / Layout resource file
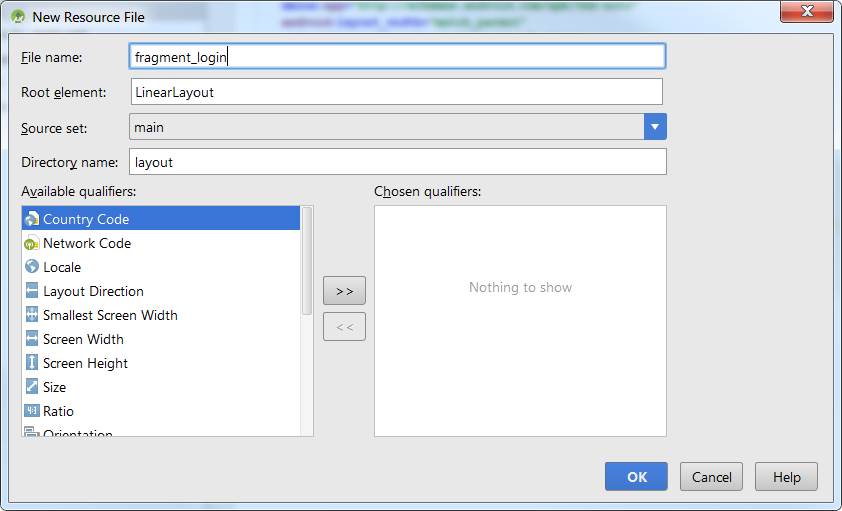
Name it fragment_login and Click OK.
You should now see the designer view. If that’s not the case, open the recently created res/layout/fragment_login.xml file and click on the Design tab located below the source code
Here is the content of my fragment_login.xml activity :
<?xml version="1.0" encoding="utf-8"?>
<LinearLayout xmlns:android="http://schemas.android.com/apk/res/android"
android:orientation="vertical"
android:layout_width="match_parent"
android:layout_height="match_parent" >
<TextView
android:layout_width="match_parent"
android:layout_height="wrap_content"
android:textAppearance="?android:attr/textAppearanceLarge"
android:text="Hello andronode!"
android:id="@+id/login_title"
android:layout_gravity="center_horizontal"
android:layout_marginTop="15dp"
android:gravity="center_vertical|center_horizontal"
android:layout_marginLeft="5dp"
android:layout_marginRight="5dp"
android:layout_marginBottom="5dp" />
<TextView
android:layout_width="match_parent"
android:layout_height="wrap_content"
android:textAppearance="?android:attr/textAppearanceMedium"
android:text="Please, enter the passphrase I sent you by email!"
android:id="@+id/login_message"
android:layout_gravity="center_horizontal"
android:layout_marginTop="15dp"
android:layout_marginBottom="5dp"
android:layout_marginRight="5dp"
android:layout_marginLeft="5dp"
android:gravity="center_horizontal" />
<EditText
android:layout_width="match_parent"
android:layout_height="wrap_content"
android:inputType="text"
android:ems="10"
android:id="@+id/login_pass"
android:layout_gravity="center_horizontal"
android:hint="Passphrase from email, or SMS, or anything"
android:layout_marginLeft="5dp"
android:layout_marginRight="5dp"
android:gravity="center_horizontal"
android:layout_marginTop="10dp" />
<Button
android:layout_width="match_parent"
android:layout_height="wrap_content"
android:text="Let's start"
android:id="@+id/login_btn"
android:layout_gravity="center_horizontal"
android:background="#325b9c"
android:textStyle="bold"
android:layout_marginTop="15dp" />
<TextView
android:layout_width="match_parent"
android:layout_height="wrap_content"
android:textAppearance="?android:attr/textAppearanceMedium"
android:text="The step by step tutorial for building this application can be found here:"
android:id="@+id/login_disclaimer"
android:layout_marginTop="20dp"
android:layout_marginRight="5dp"
android:layout_marginLeft="5dp" />
<Button
style="?android:attr/buttonStyleSmall"
android:layout_width="wrap_content"
android:layout_height="wrap_content"
android:text="https://blog.quidquid.fr"
android:id="@+id/login_btn_bloglink"
android:layout_gravity="center_horizontal"
android:paddingLeft="15dp"
android:paddingRight="15dp"
android:layout_marginTop="10dp" />
</LinearLayout>
You will notice that for the clarity of this tutorial, I will let the String resources directly inside the files (both layouts and activities), of course it is more than recommended to externalize these resources.
Along with any activity layout you have an activity java class.
We are going to create a dedicated package for our fragments, it helps visualizing our code structure and it could allow us to simplify the development of a code generator during an industrialization phase of a project.
Do just create the package fr.quidquid.andronode.fragments and add this file inside, named LoginFragment.java :
package fr.quidquid.andronode.fragments;

import android.app.Activity;
import android.content.Context;
import android.os.Bundle;
import android.support.v4.app.Fragment;
import android.view.LayoutInflater;
import android.view.View;
import android.view.ViewGroup;
import android.widget.Button;
import android.widget.EditText;
import android.widget.Toast;

import fr.quidquid.andronode.MainActivity;
import fr.quidquid.andronode.R;

/**
 * Created by Julien on 23/01/2016.
 */
public class LoginFragment extends Fragment {
  MainActivity activity;

  @Override
  public void onAttach( Context context ) {
    super.onAttach( context );
    if ( context instanceof Activity ) {
      activity = ( MainActivity ) context;
    }
  }

  @Override
  public View onCreateView( LayoutInflater inflater, ViewGroup container, Bundle savedInstanceState ) {
    setHasOptionsMenu( true );
    View view = inflater.inflate( R.layout.fragment_login, container, false );
    final EditText login_pass = ( EditText ) view.findViewById( R.id.login_pass );
    Button login_btn = ( Button ) view.findViewById( R.id.login_btn );
    login_btn.setOnClickListener( new View.OnClickListener() {
      @Override
      public void onClick( View v ) {
        Toast.makeText( getContext(), "I've been clicked !", Toast.LENGTH_SHORT ).show();
      }
    } );
    Button btn_bloglink = ( Button ) view.findViewById( R.id.login_btn_bloglink );
    btn_bloglink.setOnClickListener( new View.OnClickListener() {
      @Override
      public void onClick( View v ) {
        Toast.makeText( getContext(), "Load blog into browser!", Toast.LENGTH_SHORT ).show();
      }
    } );
    return view;
  }
}
This class is a fragment, it’s purpose is to render our fragment_login.xml. The onAttach method, is a way to access our MainActivity from our fragment.
For instance, we just declare a Button and listen if it’s click.
Now in order to see our fragment in action, open the MainActivity class and put this code :
package fr.quidquid.andronode;

import android.os.Bundle;
import android.support.v4.app.Fragment;
import android.support.v4.app.FragmentTransaction;
import android.support.v7.app.AppCompatActivity;
import android.support.v7.widget.Toolbar;
import android.widget.Toast;

import fr.quidquid.andronode.fragments.LoginFragment;

public class MainActivity extends AppCompatActivity {

  @Override
  protected void onCreate( Bundle savedInstanceState ) {
    super.onCreate( savedInstanceState );
    setContentView( R.layout.activity_main );
    Toolbar toolbar_top = ( Toolbar ) findViewById( R.id.lyt_toolbar );
    setSupportActionBar( toolbar_top );
    getSupportActionBar().setDisplayHomeAsUpEnabled( false );

    Toast.makeText( this, "Welcome to my andronode app", Toast.LENGTH_SHORT ).show();

    Fragment login_fragment = new LoginFragment();
    login_fragment.setArguments( getIntent().getExtras() );

    FragmentTransaction transaction = getSupportFragmentManager().beginTransaction();
    transaction.add( R.id.fragment_container, login_fragment );
    transaction.commit();
  }
}
In this class we set toolbar, show a simple message (toast) and add the fragment_login layout to the fragment_container via the transaction.add method (later we will use the replace method for other fragments).
Now see your application in action, connect your phone, make sure USB debug is enabled.
To enable USB debug, here is an extract from:
http://developer.android.com/tools/device.html
Enable USB debugging on your device.
On most devices running Android 3.2 or older, you can find the option under Settings > Applications > Development.
On Android 4.0 and newer, it’s in Settings > Developer options.
Note: On Android 4.2 and newer, Developer options is hidden by default. To make it available, go to Settings > About phone and tap Build number seven times. Return to the previous screen to find Developer options.
Once its done click on Run / run App
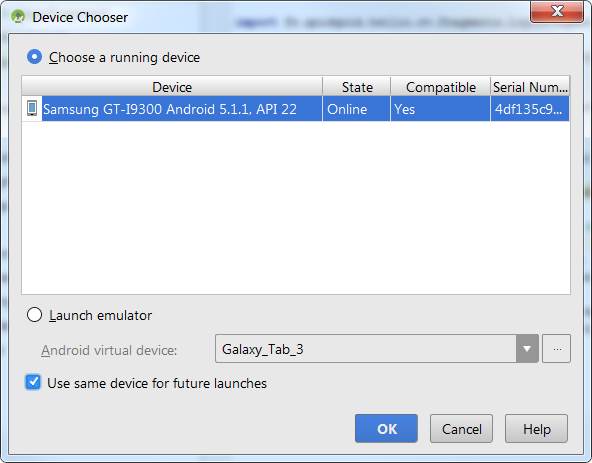
And OK, the application should launch on your device.
Now that you understand how it works, we are going to create our other views and fragments the same way, and then I’ll slightly change the main activity to add a helper method that will enable our fragments to switch to any other fragments easily….
We are going to create these views :
CHOICE : Where the user has to choose a color:
– res/layout/fragment_choice.xml
– fr.quidquid.andronode.fragments.ChoiceFragment
END: Confirmation message that the SMS has been sent, with a dynamic title and subtitle
– res/layout/fragment_end.xml
– fr.quidquid.andronode.fragments.EndFragment
Let’s start with the choice screen, and I’ll show you the navigation between fragments so you’ll be able to design whatever you want. My final app has some differences, but design philosophy is similar.
Here are my files :
res/layout/fragment_choice.xml
<?xml version="1.0" encoding="utf-8"?>
<LinearLayout xmlns:android="http://schemas.android.com/apk/res/android"
              android:layout_width="match_parent"
              android:layout_height="match_parent"
              android:orientation="vertical"
              android:weightSum="1">

  <TextView
      android:layout_width="wrap_content"
      android:layout_height="wrap_content"
      android:layout_gravity="center_horizontal"
      android:layout_marginBottom="15dp"
      android:layout_marginLeft="5dp"
      android:layout_marginRight="5dp"
      android:layout_marginTop="15dp"
      android:gravity="center_horizontal"
      android:text="Now is the time for you to choose, by answering this simple question:"
      android:textAppearance="?android:attr/textAppearanceLarge"/>

  <TextView
      android:layout_width="wrap_content"
      android:layout_height="wrap_content"
      android:layout_gravity="center_horizontal"
      android:layout_marginBottom="15dp"
      android:layout_marginLeft="5dp"
      android:layout_marginRight="5dp"
      android:layout_marginTop="5dp"
      android:gravity="center_horizontal"
      android:text="What's your favorite color?"
      android:textAppearance="?android:attr/textAppearanceLarge"
      android:textStyle="bold"/>

  <Button
      android:id="@+id/choice_btn_ok"
      android:layout_width="fill_parent"
      android:layout_height="wrap_content"
      android:layout_gravity="center_horizontal"
      android:layout_margin="15dp"
      android:layout_weight="0.07"
      android:background="#325b9c"
      android:text="Of course it's blue!"/>

  <Button
      android:id="@+id/choice_btn_ko"
      android:layout_width="match_parent"
      android:layout_height="wrap_content"
      android:layout_gravity="center_horizontal"
      android:layout_margin="15dp"
      android:layout_weight="0.07"
      android:background="#992826"
      android:text="Euh.. no, Red, it's red!"/>
</LinearLayout>
fr.quidquid.andronode.fragments.ChoiceFragment
package fr.quidquid.andronode.fragments;

import android.app.Activity;
import android.content.Context;
import android.os.Bundle;
import android.support.v4.app.Fragment;
import android.view.LayoutInflater;
import android.view.View;
import android.view.ViewGroup;
import android.widget.Button;
import android.widget.Toast;

import fr.quidquid.andronode.MainActivity;
import fr.quidquid.andronode.R;

public class ChoiceFragment extends Fragment {
  MainActivity activity;

  @Override
  public void onAttach( Context context ) {
    super.onAttach( context );
    if ( context instanceof Activity ) {
      activity = ( MainActivity ) context;
    }
  }

  @Override
  public View onCreateView( LayoutInflater inflater, ViewGroup container, Bundle savedInstanceState ) {
    setHasOptionsMenu( true );
    View view = inflater.inflate( R.layout.fragment_choice, container, false );
    Button btn_ok = ( Button ) view.findViewById( R.id.choice_btn_ok );
    btn_ok.setOnClickListener( new View.OnClickListener() {
      @Override
      public void onClick( View v ) {
        Toast.makeText( getContext(), "OK !", Toast.LENGTH_SHORT ).show();
      }
    } );
    Button btn_ko = ( Button ) view.findViewById( R.id.choice_btn_ko );
    btn_ko.setOnClickListener( new View.OnClickListener() {
      @Override
      public void onClick( View v ) {
        Toast.makeText( getContext(), "KO !", Toast.LENGTH_SHORT ).show();
      }
    } );
    return view;
  }
}
res/layout/fragment_end.xml
<?xml version="1.0" encoding="utf-8"?>
<LinearLayout xmlns:android="http://schemas.android.com/apk/res/android"
              android:layout_width="match_parent"
              android:layout_height="match_parent"
              android:orientation="vertical"
              android:weightSum="1">

  <TextView
      android:id="@+id/end_title"
      android:layout_width="match_parent"
      android:layout_height="wrap_content"
      android:layout_gravity="center_horizontal"
      android:layout_marginBottom="10dp"
      android:layout_marginLeft="5dp"
      android:layout_marginRight="5dp"
      android:layout_marginTop="10dp"
      android:textAppearance="?android:attr/textAppearanceLarge"/>

  <TextView
      android:id="@+id/end_subtitle"
      android:layout_width="wrap_content"
      android:layout_height="wrap_content"
      android:layout_gravity="center_horizontal"
      android:layout_margin="5dp"
      android:textAppearance="?android:attr/textAppearanceMedium"/>

</LinearLayout>
fr.quidquid.andronode.fragments.EndFragment
package fr.quidquid.andronode.fragments;

import android.app.Activity;
import android.content.Context;
import android.os.Bundle;
import android.support.v4.app.Fragment;
import android.view.LayoutInflater;
import android.view.View;
import android.view.ViewGroup;
import android.widget.Button;
import android.widget.EditText;
import android.widget.TextView;
import android.widget.Toast;

import fr.quidquid.andronode.MainActivity;
import fr.quidquid.andronode.R;

public class EndFragment extends Fragment {

  MainActivity activity;

  @Override
  public void onAttach( Context context ) {
    super.onAttach( context );
    if ( context instanceof Activity ) {
      activity = ( MainActivity ) context;
    }
  }

  @Override
  public View onCreateView( LayoutInflater inflater, ViewGroup container, Bundle savedInstanceState ) {
    setHasOptionsMenu( true );
    View view = inflater.inflate( R.layout.fragment_end, container, false );

    TextView title =  ( TextView ) view.findViewById( R.id.end_title);
    TextView subtitle =  ( TextView ) view.findViewById( R.id.end_subtitle);

     title.setText( "Nothing interesting yet" );
     subtitle.setText( "Well, as we will be changed depending on the users choice, we see our implementation in the logic part of this tutorial." );

    return view;
  }
}
When the users clicks on the Let’s start button from the login fragment we need to navigate to the choice fragment.
Remember that we will add the logic (validation, connections later, for instance let’s keep the complexity at a manageable level).
Inside the MainActivity let’s add a function that is useful to load fragments. As a parameter it takes a Fragment class and instanciate it for us, taking care of its lifecycle.
public void load_fragment( Class clazz ) {
  load_fragment( clazz, new Bundle() );
}
public void load_fragment( Class clazz, Bundle args ) {
  try {
    FragmentTransaction transaction = getSupportFragmentManager().beginTransaction();
    Fragment current = getSupportFragmentManager().findFragmentById( R.id.fragment_container );
    Fragment fragment = ( Fragment ) clazz.newInstance();
    String fragment_tag = fragment.getClass().getName();
    fragment.setArguments( args );
    if ( current == null ) {
      transaction.add( R.id.fragment_container, fragment, fragment_tag );
    }
    else {
      transaction.replace( R.id.fragment_container, fragment, fragment_tag );
      transaction.addToBackStack( fragment_tag );
    }
    transaction.commit();
  }
  catch ( Exception e ) {
    e.printStackTrace();
    // treat your exceptions with respect, you can't just let them go... except when I'm doing tutorials...
  }
}
Basically it’s just dynamic instantiation, when you want to load a fragment you just call :
activity.load_fragment( MyFabulousFragment.class <, optional bundle parameters > );
The transaction manager takes care of the fragment’s life cycle, we have 2 cases. Either the view must be added via the transaction.add function (initial view) or we need to replace the fragment by an other transaction.replace.
In order to support the history button (back button) we use the class name as a tag.
And that’s all… adding new Fragment doesn’t require to modify the MainActivity class…
Let’s use this method.
Change the way LoginFragment is loaded in the onCreate method of MainActivity class, by replacing the code :
    Fragment login_fragment = new LoginFragment();
    login_fragment.setArguments( getIntent().getExtras() );

    FragmentTransaction transaction = getSupportFragmentManager().beginTransaction();
    transaction.add( R.id.fragment_container, login_fragment );
    transaction.commit();
with :
load_fragment( LoginFragment.class, getIntent().getExtras() );
From LoginFragment to ChoiceFragment :
Change the Login button’s action inside the LoginFragment class on the onClicks function that should load the ChoiceFragment.
Replace
Toast.makeText( getContext(), "I've been clicked !", Toast.LENGTH_SHORT ).show();
by
activity.load_fragment( ChoiceFragment.class );
From ChoiceFragment to EndFragment :
Change the Choice buttons’ action inside the ChoiceFragment class on the onClicks function that should load the EndFragment.
Replace
Toast.makeText( getContext(), "OK !", Toast.LENGTH_SHORT ).show();
with :
activity.load_fragment( EndFragment.class );
Now our GUI seems clean, we have to add our back-end services.
Server side using Node.JS
Inside your initial folder D:\DEV\AndroNode_tuto create another directory, this one will hold our NodeJS server application, and ensure NodeJS and NPM are working from your command line (otherwise go back to the Required softwares).
D:\DEV\AndroNode_tuto>mkdir NodeJS_app
D:\DEV\AndroNode_tuto>cd NodeJS_app
D:\DEV\AndroNode_tuto\NodeJS_app>npm -version
3.5.2
D:\DEV\AndroNode_tuto\NodeJS_app>node -v
v4.2.4
Inside the D:\DEV\AndroNode_tuto\NodeJS_app folder create a file named package.json containing these lines:
{
  "name": "andronode-server",
  "version": "1.0.0",
  "main": "app.js",
  "scripts": {
    "start": "node app.js"
  }
}
package.json is the npm project configuration file, where will be dependencies and every project related things.
Let’s add some dependencies :
- express : a nice web framework
- twilio : NodeJS Twilio module
- config-multipaas : support for several popular cloud deployment
- randexp : generate random string from regular expressions
Ok, be aware, that installing dependencies via npm is quite difficult :
D:\DEV\AndroNode_tuto\NodeJS_app>npm install --save express config-multipaas twilio randexp
Done.. I warned you!
Notice :
– your package.json file has changed and a dependencies value appeared (because of the --save option).
– a node_modules folder is present containing all the dependencies you need.
Always in the same folder, create a file named app.js and add this content:
var express = require('express'); // Loading express module
var randexp = require('randexp'); // Loading randexp module
var cc = require('config-multipaas'); // Used by cloud providers
var config = cc().add({ PORT: 8080, IP: '127.0.0.1' });
var app = express();                    // instanciate the express module

// **** Routes mapping
app.get('/', function (req, res) {   // listening on http get request on /
  res.send('Hoy!');  // Write 'Hoy !' on the response out stream
});

app.get('/status', function (req, res, next) { // often used by cloud providers
  res.send('{"status":"ok"}');
});

// *** Launch the server
app.listen(config.get('PORT'), config.get('IP'), function () {
  console.log( "Listening on " + config.get('IP') + " :" + config.get('PORT') )
});
I put some comments in this file so the code is quite explicit.
Now you can start your server :
D:\DEV\AndroNode_tuto\NodeJS_app>node app.js
Listening on127.0.0.1:8080
Open your browser (or use curl, or postman or any REST client…) : http://127.0.0.1:8080/ and you should have a Hoy ! message.
Ok now we need to add routes that will serve ou needs wich is :
- /auth : listens for the passphrase of the login screen, if the passphrase is wrong, send a error message, if the passphrase is good it will send back a token (randomly generated) to the phone. This token will have an expiration time (10 minutes or whatever you think is good), and will be sent once the user has choosen. This way we ensure only people with the right passphrase will be able to send a message.
- /send : sends back the token and the message to send. Verifies the validity of the token (existence and expirration) then sends the message to the recipient phone number
Let’s add the routes inside the apps.js file returning nothing, but with explanations of the awaited logic :
app.get('/auth/:passphrase', function (req, res) {
    // check passphrase against a static defined one (enough for our needs)
    // Generate a random token
    // Keep it somewhere along with an expiration timestamp
    // Return it to the client (our Android application)
});

app.get('/send/:token/:message', function (req, res) {
  // Check if the given token exist in our list and has not expired
  // send the message to the recipient phone number
});
Now let’s implement them. Start by defining 2 variables
var PASSPHRASE = 'Hohoho-SeCret';
var tokens = [] ;
The passphrase will be written inside an email and will be checked against the one provided by the user from the Login screen of our Android application.
The tokens is just an array that will store all the generated tokens, we could use a database but my usage is so confidential that I do not expect thousands of token creation that could overflow the memory.
And we implement the /auth route
app.get('/auth/:passphrase', function (req, res) {
  // check passphrase request argument against a static defined one (enough for our needs)
  if ( req.params['passphrase'] === PASSPHRASE ) {
    // prepare the token object
    var token = {};
    // Generate a random token
    token.random = new randexp(/^[a-zA-Z0-9]{64}$/).gen();
    // Add an expiration timestamp in millisecond
    token.expire = new Date().getTime() + 600000;
    // Keep it somewhere
    tokens.push( token );
    // Return it to the client (our Android application)
    res.status( 201 ).send( token.random );
  }
  else {
    res.status( 401 ).send( 'Incorect passphrase!' );
  }
});
Explanations are inside the code, nothing difficult. Note that we use the http status code to return errors.
And now implement first part of the /send route (everything except Twilio’s SMS capability):
app.get('/send/:token/:message', function (req, res) {
  var token = req.params['token'];
  var message = req.params['message'];
  var sending_message = false;
  // while reading tokens we remove any expired token
  for (var i = 0; i < tokens.length; i ++ ){
    var tok  = tokens[i];
    if ( new Date().getTime() > tok.expire ) {
      // Removing expired token
      tokens.splice(i, 1);
    }
    else if (tok.random === token ) {
      // Token is ok so we are going to send a message (or at least try)
      sending_message = true;
      // Removing used token
      tokens.splice(i, 1);

      // TO REPLACE : SEND MESSAGE VIA TWILIO HERE !
      console.log( 'Sending message: ' + message);
      res.status( 200 ).send('Message sent');
    }
  }
  if ( ! sending_message) {
    // Not giving the real reason is a security choice
    res.status( 401 ).send('Token not found or expired');
  }
});
Twilio
The only thing left is to implement Twilio’s SMS message sending.
Twilio’s configuration
Configuring Twilio’s account to get a SMS enabled phone number
If you don’t already have an account go there: https://www.twilio.com
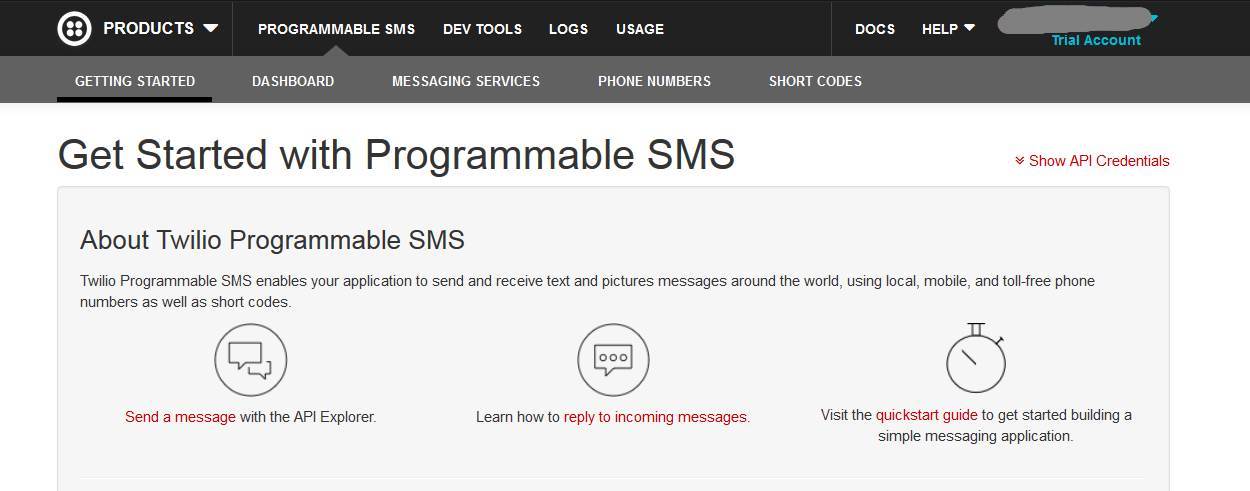
And create an account, follow the instructions, as Twilio’s documentation is remarquable. Once you’ve register, get your TWILIO_ACCOUNT_SID and TWILIO_AUTH_TOKEN by clicking on « Show API credentials » from your Twilio’s account dashboard :
You must get verified your mobile number before sending SMS with the trial account.
https://www.twilio.com/user/account/two-factor/verify
Then you have to obtain a Twilio phone number that is SMS enabled by going there :
https://www.twilio.com/user/account/phone-numbers/getting-started
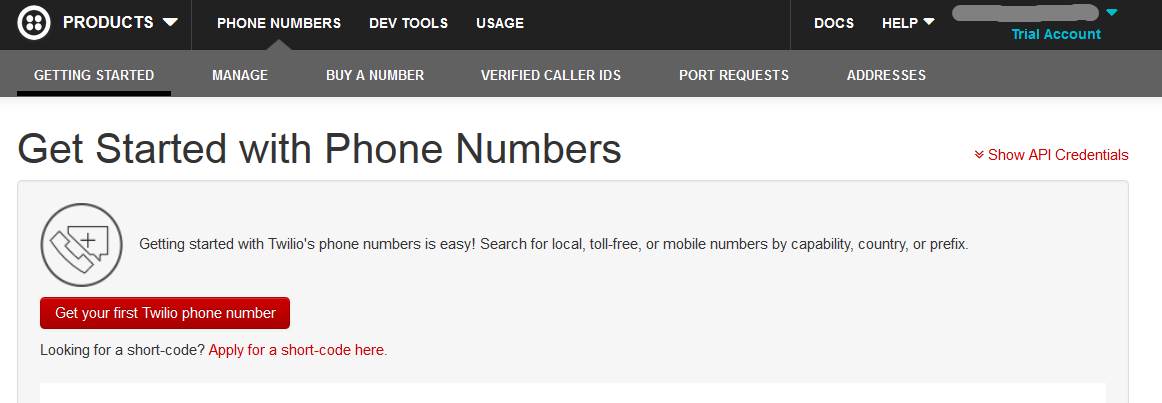
Click on « Get your first Twilio phone number:
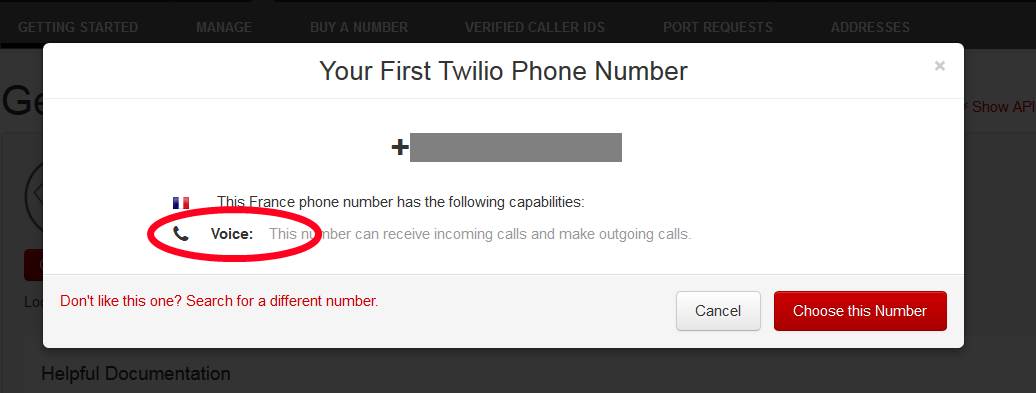
If the number doesn’t have the SMS capability, click on the bottom left link :
Don’t like this one? Search for a different number.
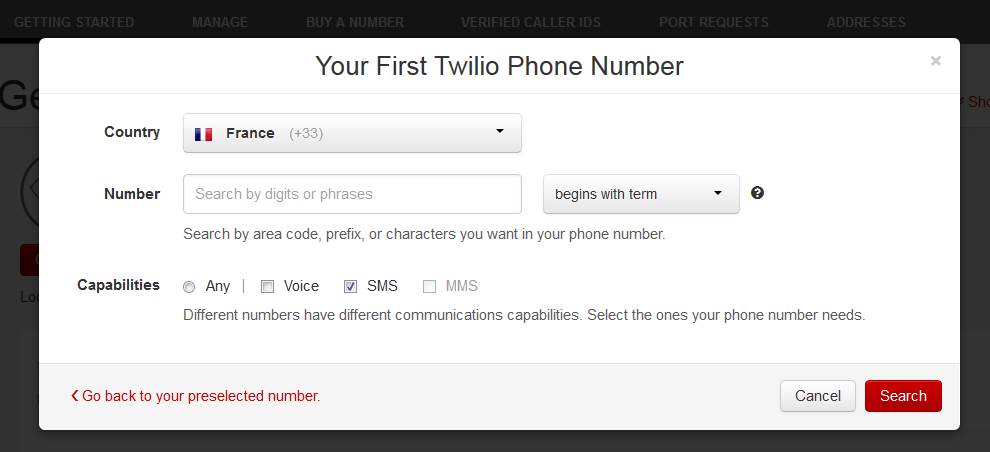
Select the SMS checkbox and click on search.
For the country, select the same as the number you wish to send an SMS, and be sure the country has SMS capability :
Then click on Search button

And choose this number.
Be aware that some phone number could require an address, enter the information on the next screen, and :
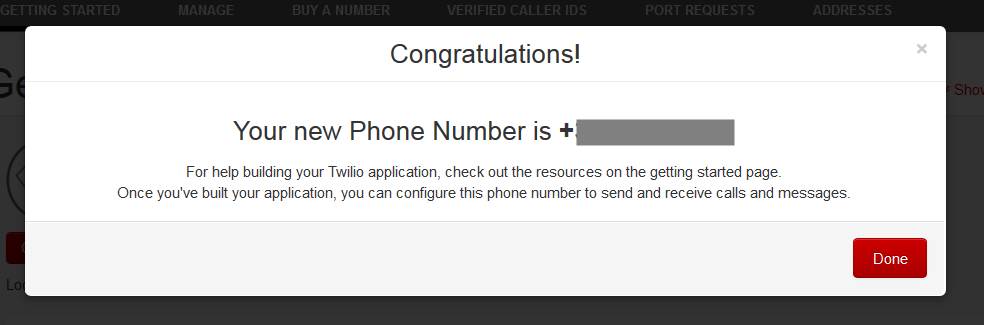
And done, you now have a Twilio phone number with SMS capability.
If you get back onto your Manage numbers page https://www.twilio.com/user/account/phone-numbers/incoming ) you should see the SMS enabled (green check).
Twilio’s implementation
Now we are going to send SMS from the server.
Using a module : https://github.com/twilio/twilio-node/
Easy tutorial can be found here : http://twilio.github.io/twilio-node/
Then we’re going to defines some constants to our app.js fileand also require Twilio’s module:
var TWILIO_ACCOUNT_SID = '<Put your SID here>';
var TWILIO_AUTH_TOKEN = '<Put your TOKEN here>';
var TWILIO_PHONE_NUMBER = '+XXXXXXXXXXX';
var RECIPIENT_PHONE_NUMBER = '+XXXXXXXXXXX';
// require Twilio node module with SID and TOKEN
var client = require('twilio')(TWILIO_ACCOUNT_SID, TWILIO_AUTH_TOKEN);
Now all we have to to is replace the :
      // TO REPLACE : SEND MESSAGE VIA TWILIO HERE !
      console.log( 'Sending message: ' + message);
      res.status( 200 ).send('Message sent');
with this code:
      //Send an SMS text message
      client.sendMessage({
        to: RECIPIENT_PHONE_NUMBER,
        from: TWILIO_PHONE_NUMBER,
        body: message
      },
      function(err, responseData) {
        if (!err) {
          res.status( 200 ).send('Message sent, have a lovely day!');
        }
        else {
          res.status( 500 ).send('Error while sending the SMS!');
        }
      });
So our full app.js file looks like this :
var express = require('express'); // Loading express module
var randexp = require('randexp'); // Loading randexp module
var cc = require('config-multipaas'); // Used by cloud providers
var config = cc().add({ PORT: 8080, IP: '127.0.0.1' });
var app = express(); // instanciate the module
// **** Routes mapping
app.get('/', function (req, res) { // listening on http get request on /
res.send('Hoy!'); // Write 'Hoy !' on the response out stream
});
app.get('/status', function (req, res, next) { // often used by cloud providers
res.send('{"status":"ok"}');
});
var TWILIO_ACCOUNT_SID = '<Put your SID here>';
var TWILIO_AUTH_TOKEN = '<Put your TOKEN here>';
var TWILIO_PHONE_NUMBER = '+XXXXXXXXXXX';
var RECIPIENT_PHONE_NUMBER = '+XXXXXXXXXXX';
// require Twilio node module with SID and TOKEN
var client = require('twilio')(TWILIO_ACCOUNT_SID, TWILIO_AUTH_TOKEN);
var PASSPHRASE = 'Hohoho-SeCret';
var tokens = [] ;
app.get('/auth/:passphrase', function (req, res) {
// check passphrase request argument against a static defined one (enough for our needs)
if ( req.params['passphrase'] === PASSPHRASE ) {
// prepare the token object
var token = {};
// Generate a random token
token.random = new randexp(/^[a-zA-Z0-9]{64}$/).gen();
// Add an expiration timestamp (600000 is 10 minutes in milliseconds)
token.expire = new Date().getTime() + 600000;
// Keep it somewhere
tokens.push( token );
// Return it to the client (our Android application)
res.status( 201 ).send( token.random );
}
else {
res.status( 401 ).send( 'Incorect passphrase!' );
}
});
app.get('/send/:token/:message', function (req, res) {
var token = req.params['token'];
var message = req.params['message'];
var sending_message = false;
// while reading tokens we remove any expired token
for (var i = 0; i < tokens.length; i ++ ){
var tok = tokens[i];
if ( new Date().getTime() > tok.expire ) {
// Removing expired token
tokens.splice(i, 1);
}
else if (tok.random === token ) {
// Token is ok so we are going to send a message (or at least try)
sending_message = true;
// Removing used token
tokens.splice(i, 1);
//Send an SMS text message
client.sendMessage({
to: RECIPIENT_PHONE_NUMBER,
from: TWILIO_PHONE_NUMBER,
body: message
},
function(err, responseData) {
if (!err) {
res.status( 200 ).send('Message sent, have a lovely day!');
}
else {
res.status( 500 ).send('Error while sending the SMS!');
}
});
}
}
if ( ! sending_message) {
// Not giving the real reason is a security choice
res.status( 401 ).send('Token not found or expired');
}
});
// *** Launch the server
app.listen(config.get('PORT'), config.get('IP'), function () {
console.log( "Listening on " + config.get('IP') + " :" + config.get('PORT') )
});
And now is the time to test your server-side application
At least some tests
You should use a testing framework for your tests. as it’s beyond this tutorial.
startup your server :
D:\DEV\AndroNode_tuto\NodeJS_app>node app.js
Listening on 127.0.0.1 :8080
And make som tests, I will use curl….
D:\DEV\AndroNode_tuto>curl http://127.0.0.1:8080/auth/WrongPassphrase
Incorect passphrase!

D:\DEV\AndroNode_tuto>curl http://127.0.0.1:8080/auth/Hohoho-SeCret
GnCgQ6ExVxvQPKEaoeMJCrOo3KT1fbKB8XgAupOwFr1IJ9aYKUy4ZRX78lMDqvGx
Now try to send a message by using the generated token, and adding a message.
The %20 represents the character space from the keyboard
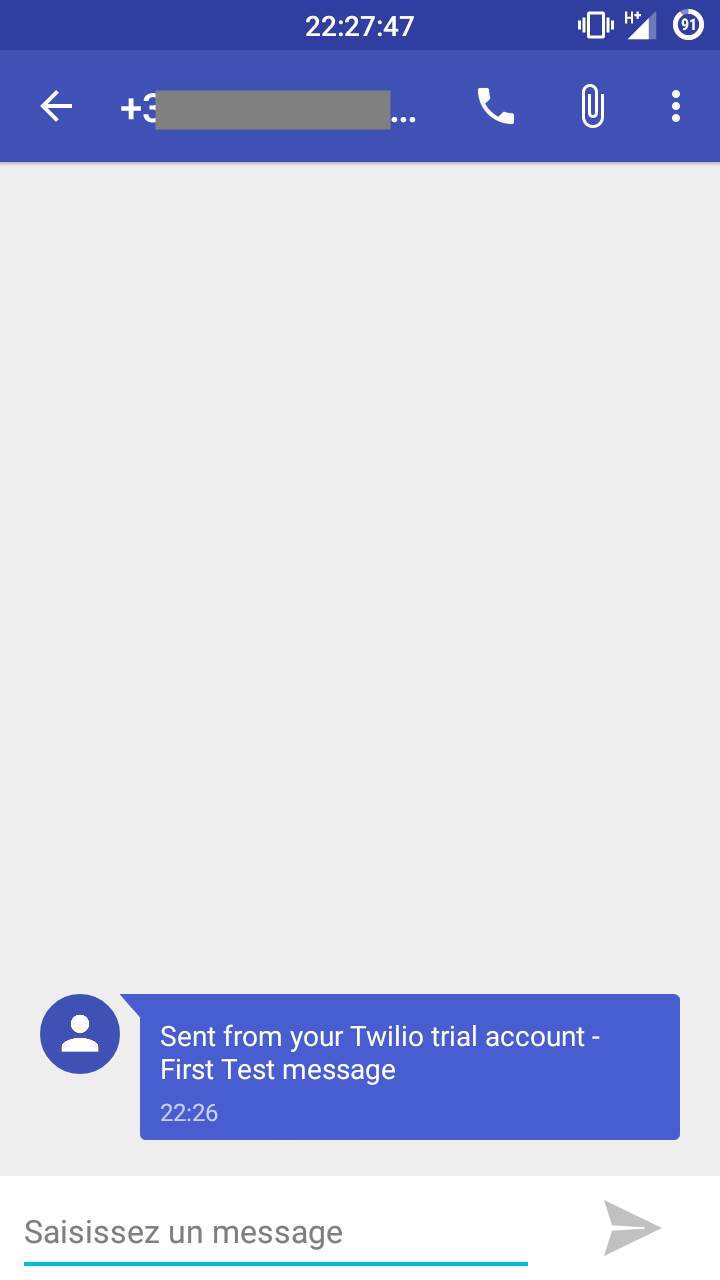
D:\DEV\AndroNode_tuto>curl http://127.0.0.1:8080/send/GnCgQ6ExVxvQPKEaoeMJCrOo3KT1fbKB8XgAupOwFr1IJ9aYKUy4ZRX78lMDqvGx/First%20Test%20Message
Message sent, have a lovely day!
And voilà:
In order to check every aspect, take some time to test that token expiry & token reuse are working as expected.
Next steps
1- Deploy our NodeJS server application on a server (Heroku / Google cloud / Openshift / … whatever you like or own)
2- Modify our Android application to call our server once it’s deployed…
Of course you could (and should) use some Node module to handle your configuration in different environment (dev, test, prod, …) like the node-config module https://github.com/lorenwest/node-config but this is out of the current scope.
Deployment of your server application
For this part create some dedicated folder :
D:\DEV\AndroNode_tuto>mkdir Openshift_app
D:\DEV\AndroNode_tuto>cd Openshift_app
D:\DEV\AndroNode_tuto\Openshift_app>mkdir KEYS
The Openshift_app folder will be the git repository to push our application to Openshift’s server.
The Keys folder will keep our public / private keys (you should keep them in a more robust place).
If you don’t already have an openshift account go there :https://www.openshift.com/ you will be able to use as long as you want without being charged up to 3 small gears.
Sign-up for free and once it’s done go to your applications console web page :
https://openshift.redhat.com/app/console/applications
and click on Create your first application now .
Several preconfigured types of servers exists so let’s use the Node.js v 0.12 one
Choose a public url, select a region where you can use small gears and click on Create applications
Wait until the server is deployed then Click on “Yes, help me get started”
Generate keys
Openshift is asking for a public key (that goes along with your private key), if you already have one no problem, otherwise use a tool like puttyGen (http://www.chiark.greenend.org.uk/~sgtatham/putty/download.html) to get one.
Launch PuttyGen
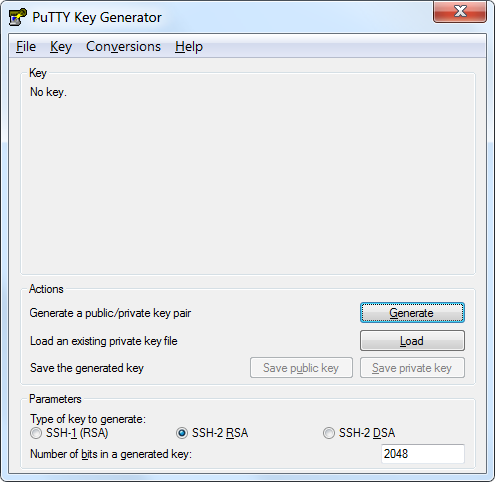
Click on “Generate” and Move your mouse around as asked and you should have something like this :
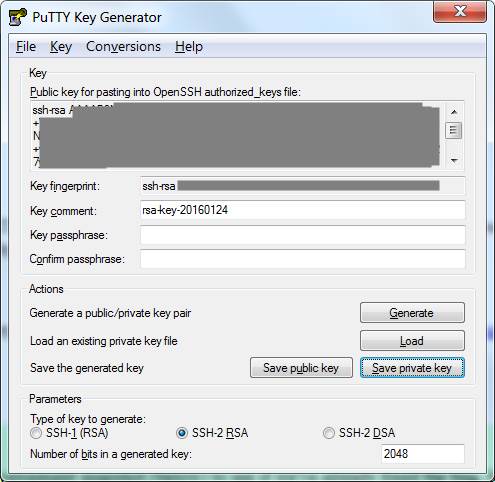
click on “save public key” and save the file inside the D:\DEV\AndroNode_tuto\Openshift_app\KEYS folder, you can name it my_key_for_openshift.pub for example. Then click on save private key : my_key_for_openshift.ppk
Click on Conversions (in the toolbar) Export OpenSSH key and save it as my_key_for_openshift.ssh
Openshift is waiting for the content I grayed out on the last screenshot, so copy paste it inside their text area.
GIT with openshift
You need to have a functionnal git installation, working on the command line.
This is mostly for windows users as they’ll need some tweaks.
If you’re on windows, Copy your my_key_for_openshift.ssh file into your user’s .ssh folder and name it id_rsa as git client on windows will check for this file to connect to the repository.
Should look like this : C:\Users\Julien\.ssh\id_rsa
Open a command line inside your Openshift_app folder (mine is D:\DEV\AndroNode_tuto\Openshift_app).
tell your command line where your ssh agent is :
D:\DEV\AndroNode_tuto\Openshift_app>set GIT_SSH=C:\Program Files (x86)\Git\bin\ssh.exe
Adapt the previous line with your git install folder…
then we can clone our openshift repositpry (use your repository address):
D:\DEV\AndroNode_tuto\Openshift_app>git clone ssh://xxxxxxxxxxxxxxxxxxxxxxxxx@<yourapp>-<yourdomain>.rhcloud.com/~/git/andronode.git/

and answer yes if asked.

Cloning into 'andronode'...
remote: Counting objects: 122, done.
remote: Compressing objects: 100% (76/76), done.
Receiving objects:  31% (38/122)   d 122 (delta 39)R
Receiving objects: 100% (122/122), 44.52 KiB | 0 bytes/s, done.
Resolving deltas: 100% (39/39), done.
Checking connectivity... done.
Now all you have to do is replace the current application with yours.
Just copy your app.js and package.json files from NodeJS_app to Openshift_app/andronode
Remove all files you don’t really need from Openshift_app/andronode folder:
These are the files we keep:
Folder .openshift
Folder nodes_modules
File app.js
File package.json
Run npm install in order to download the dependencies we use inside the deployment version
D:\DEV\SVN_PERSO\ANDROID\Openshift_app\andronode>npm install
And then publish all our changes to openshift’s git repo :
D:\DEV\SVN_PERSO\ANDROID\Openshift_app\andronode>git add .
D:\DEV\SVN_PERSO\ANDROID\Openshift_app\andronode>git commit -m "Initial version"
D:\DEV\SVN_PERSO\ANDROID\Openshift_app\andronode>git push
... BLA ...
... BLA ^2 ...
remote: npm info ok
remote: Preparing build for deployment
...  ...
... BLA ^n ...
...  ...
remote: Git Post-Receive Result: success
remote: Activation status: success
remote: Deployment completed with status: success
Now go to your http:// and see the result !
Test your /send and /auth urls also !
Back to Android application
1- Check the passphrase
2- Send the message with the token
Open Android Studio and add a dependency to okhttp library (http://square.github.io/okhttp/)
Open your Android_app\app\build.gradle file and add this dependency :
compile ‘com.squareup.okhttp3:okhttp:3.0.1’
So dependencies looks like that :
dependencies {
  compile fileTree(dir: 'libs', include: ['*.jar'])
  testCompile 'junit:junit:4.12'
  compile 'com.android.support:appcompat-v7:23.1.1'
  compile 'com.squareup.okhttp3:okhttp:3.0.1'
}
And synchronize if Android studio asks you.
We have to :
– change Login fragment to call the /auth url with the incoming passphrase from the user
– Open browser on the blog link button click
– check if the internet connection is active befor doing network calls
– if passphrase is correct, get the token and pass it to the choice fragment
– construct the send message url depending on the user’s choice
– show the EndFragment with the dynamic title and message
Login logic
Let’s change a little bit LoginFragment and set the login_btn.setOnClickListener like this :
    login_btn.setOnClickListener( new View.OnClickListener() {
      @Override
      public void onClick( View v ) {
        // Checking internet connection
        ConnectivityManager connMgr = (ConnectivityManager ) activity.getSystemService(Context.CONNECTIVITY_SERVICE);
        NetworkInfo networkInfo = connMgr.getActiveNetworkInfo();
        if (networkInfo != null && networkInfo.isConnected()) {
          new RequestTask().execute("http://<YOURAPPLI>-<YOURDOMAIN>.rhcloud.com/auth/" + login_pass.getText().toString() );
        } else {
          Toast.makeText( getContext(), "No internet connection!\nPlease, retry later.", Toast.LENGTH_SHORT ).show();
        }
      }
    } );
What it does is
– checks if the device has an internet connection
– if internet is ok we build the url of our NodeJS openshift’s server onto the /auth/:passphrase route
– else a message telling the user has to retry later
notice the RequestTask(), which is a class we are going to add as an internal class within the LoginFragment class (easier to understand how it works this way) because on Android you must avoid to start http connections on the main UI thread so you won’t block it.
Add this :
private class RequestTask extends AsyncTask<String, String, ServerResult>{
  @Override
  protected ServerResult doInBackground(String... url) {
    try {
      OkHttpClient client = new OkHttpClient();
      Request request = new Request.Builder()
          .url(url[0])
          .build();
      Response response = client.newCall( request ).execute();
      return new ServerResult( response.isSuccessful(), response.body().string() );
    }
    catch ( IOException e ) {
      return new ServerResult( false, e.getMessage() );
    }
  }
  @Override
  protected void onPostExecute(ServerResult result) {
    super.onPostExecute(result);
    if (result.success) {
      // and send the token to the choice fragment
      Bundle bundle = new Bundle();
      bundle.putString( "token", result.output );
      // And then load the user choice screen
      activity.load_fragment( ChoiceFragment.class, bundle );
    }
    else {
      Toast.makeText( getContext(), "I'm terribly sorry, but the passphrase is incorrect...", Toast.LENGTH_SHORT ).show();
    }
  }
}
Notice the bundle.putString( "token", result.output ); that pass the token to the next fragment.
You should have an error with the ServerResult object, it’s a simple class used to store our answers, you can create this class on the base package :
package fr.quidquid.andronode;
public class ServerResult {
  public boolean success = false;
  public String output = "";
  public ServerResult( boolean success, String output ) {
    this.success = success;
    this.output = output;
  }
}
The interesting part is on the onPostExecute method where you have some comments explaining what it does.
Notice that you’ll have to add a variable to your MainActivity class :
public String server_token;
this will be usefull to keep the value of our token, that will allows the call of the send message (if it has not expired meanwhile.
Blog button
Then we also want to open the browser on the second button (blog link). Still inside the LoginFragment class change the btn_bloglink.setOnClickListener comportement :
btn_bloglink.setOnClickListener( new View.OnClickListener() {
  @Override
  public void onClick( View v ) {
    Intent browserIntent = new Intent( Intent.ACTION_VIEW, Uri.parse( "https://blog.quidquid.fr/2016/01/android-nodejs-openshift-twilio/" ));
    startActivity( browserIntent );
  }
} );
Just calling an intent on a Uri, the device will choose the best action for the user(or ask to choose).
Choice logic
First we have to get the token sent by the LoginFragment.
Open the ChoiceFragment class and add the bundle token code right after the view.inflater line:
    View view = inflater.inflate( R.layout.fragment_choice, container, false );

    Bundle bundle = this.getArguments();
    final String token = bundle.getString("token", null);
    if (token == null) {
      // go back to LoginFragment
      activity.load_fragment( LoginFragment.class );
    }
Now we have the token, on the user’s choice fragment, call the other route /send/:token/:message
Process is quite the same as for the LoginFragment, open the ChoiceFragment class and change the buttons’ action:
Code for the OK button:
btn_ok.setOnClickListener( new View.OnClickListener() {
  @Override
  public void onClick( View v ) {
    bundle_choice = new Bundle();
    bundle_choice.putBoolean( "answer", true );
    send_message( "Hi me, favorite color is blue!", token );
  }
} );
Code for the KO button:
btn_ko.setOnClickListener( new View.OnClickListener() {
  @Override
  public void onClick( View v ) {
    bundle_choice = new Bundle();
    bundle_choice.putBoolean( "answer", false );
    send_message( "Hi me, favorite color is red", token );
  }
} );
Both these buttons are calling the send_message function:
private void send_message( String message ) {
  // Checking internet connection
  ConnectivityManager connMgr = (ConnectivityManager ) activity.getSystemService( Context.CONNECTIVITY_SERVICE);
  NetworkInfo networkInfo = connMgr.getActiveNetworkInfo();
  if (networkInfo != null && networkInfo.isConnected()) {
    new RequestTask().execute( "http://<YOURAPP>-<YOURDOMAIN>.rhcloud.com/send/" + activity.server_token + "/" + message );
  } else {
    Toast.makeText( getContext(), "No internet connection!\nPlease, retry later.", Toast.LENGTH_SHORT ).show();
  }
}
It’s almost the same as what we did in the LoginFragment, now we once again add a private RequestTask class working quite but not completely the same:
private class RequestTask extends AsyncTask<String, String, ServerResult> {
  @Override
  protected ServerResult doInBackground(String... url) {
    try {
      OkHttpClient client = new OkHttpClient();
      Request request = new Request.Builder()
          .url(url[0])
          .build();
      Response response = client.newCall( request ).execute();
      return new ServerResult( response.isSuccessful(), response.body().string() );
    }
    catch ( IOException e ) {
      return new ServerResult( false, e.getMessage() );
    }
  }
  @Override
  protected void onPostExecute(ServerResult result) {
    super.onPostExecute( result );
    if (result.success) {
      activity.load_fragment( EndFragment.class, bundle_choice );
    }
    else {
      // token is incorrect or has expired, let's go back to login screen
      // In a real app you would just ask for a new token and retry (with a counter limit)
      activity.load_fragment( LoginFragment.class );
    }

    Toast.makeText( getContext(), result.output, Toast.LENGTH_SHORT ).show();
  }
}
You will needt o add a Bundle bundle_choice; global variable, this object will keep the choice of the user and pass it too the EndFragment.
This time on the onPostExecute we just load the EndFragment (on success only) and show the answer from the server.
End fragment logic
We just need to obtain the bundle “answer” and show the corresponding title and subtitle
Open the EndFragment class and inside the onCreateView method and replace the :
  title.setText( "Nothing interesting yet" );
    subtitle.setText( "Well, as we will be changed depending on the users choice, we see our implementation in the logic part of this tutorial." );
with
    Bundle bundle = this.getArguments();
    if ( bundle.getBoolean( "answer", false ) ){
      title.setText( "Blue is the sky" );
      subtitle.setText( "Iknew your favorite color was red... euh, no, blue!\n\n" +
          "Have a lovely day!" );
    }
    else {
      title.setText( "Red is dead baby... Red is dead." );
      subtitle.setText( "Iknew your favorite color was blue... euh, no, red!\n\n" +
          "Have a lovely day!" );
    }
You can now test your Android application…
Packaging (it’s the final step !!!!)
Last step is to package your android application in order to distribute it. Google’s resource for sign-in :
http://developer.android.com/tools/publishing/app-signing.html
For those of you who already deployed an android application to the Play store, use your existing keystore, for others let’s create one.
To make it simple, a keystore is a file where we store keys, the keystore has a password to access it, and every key stored inside the keystore will also have a password, different from the keystore’s one.
I will name my keystore : my-release-key.keystore
I will name my key (for sign-in) : QuidquidAndroidKey
Open a command line and execute the keytool utility (bundled with the JDK) (french ouput sorry) :
D:\DEV\SVN_PERSO\ANDROID\Openshift_app\KEYS>keytool -genkey -v -keystore my-release-key.keystore -alias QuidquidAndroidKey -keyalg RSA -keysize 204
8 -validity 10000
Entrez le mot de passe du fichier de clés :<invent a keystore password>
Ressaisissez le nouveau mot de passe :<confirm your keystore password>
Quels sont vos nom et prénom ?
  [Unknown]:  Julien Revault d'Allonnes
Quel est le nom de votre unité organisationnelle ?
  [Unknown]:
Quel est le nom de votre entreprise ?
  [Unknown]: Quidquid
Quel est le nom de votre ville de résidence ?
  [Unknown]:  Ondres
Quel est le nom de votre état ou province ?
  [Unknown]:  Aquitaine
Quel est le code pays à deux lettres pour cette unité ?
  [Unknown]:  FR
Est-ce CN=Julien Revault d'Allonnes, OU=Unknown, O=Quidquid, L=Ondres, ST=Aquitaine, C=FR ?
  [non]:  yes

Génération d'une paire de clés RSA de 2 048 bits et d'un certificat auto-signé (SHA256withRSA) d'une validité de 10 000 jours
        pour : CN=Julien Revault d'Allonnes, OU=Quidquid, O=Unknown, L=Ondres, ST=Aquitaine, C=FR
Entrez le mot de passe de la clé pour <Quidquid_android>
        (appuyez sur Entrée s'il s'agit du mot de passe du fichier de clés) :<invent the key's password>
Ressaisissez le nouveau mot de passe :<confirm the key's password>
[Stockage de my-release-key.keystore]
Now a key named Quidquid_android is stored inside my keystore my-release-key.keystore.
In order to sign your apk using this key, you can use Android studio or change the gradle.build file, and that’s what we’re going to do, as it allows us to automate the released APK generation as we can avoid user interaction.
Open the Android_app\app\build.gradle file and add this block and replace with your own informations :
android {
...
  signingConfigs {
    release {
      storeFile file("my-release-key.keystore")
      storePassword "<your keystore password>"
      keyAlias "Quidquid_android"
      keyPassword "<your key password>"
    }
  }
...
The signingConfigs block must be before the buildTypes block, or otherwise you’ll get this error :
Could not find property 'release' on SigningConfig container
And add inside buildTypes
  release {
    ...
    signingConfig signingConfigs.release
My full build.gradle file nows looks like this :
apply plugin: 'com.android.application'
android {
  compileSdkVersion 23
  buildToolsVersion "23.0.1"
  defaultConfig {
    applicationId "fr.quidquid.andronode"
    minSdkVersion 12
    targetSdkVersion 23
    versionCode 1
    versionName "1.0"
  }
  signingConfigs {
    release {
      storeFile file("<D:/path/to/your/>my-release-key.keystore")
      storePassword "<your keystore password>"
      keyAlias "QuidquidAndroidKey"
      keyPassword "<your key password>"
    }
  }
  buildTypes {
    release {
      minifyEnabled false
      proguardFiles getDefaultProguardFile('proguard-android.txt'), 'proguard-rules.pro'
    }
  }
}
dependencies {
  compile fileTree(include: ['*.jar'], dir: 'libs')
  testCompile 'junit:junit:4.12'
  compile 'com.android.support:appcompat-v7:23.1.1'
  compile 'com.squareup.okhttp3:okhttp:3.0.1'
}
To generate the signed APK just run :
D:\DEV\AndroNode_tuto\Android_app>gradle assembleRelease

:app:preBuild UP-TO-DATE
...
...
:app:assembleRelease

BUILD SUCCESSFUL
Total time: 6.373 secs
The generated signed apk named app-release.apk is in the Android_app\app\build\outputs\apk folder.
One security aspect though, having your keystore password and keys inside your build file isn’t really secure as you may (should…must…) use a source control version mecanism (git, svn, …) and you definitly don’t want these informations to be known by lots of people.
A solution is to keep your passwords outside by replacing them with environment variables like this :
storePassword System.getenv(“KEYSTORE_PASSWORD”)
keyPassword System.getenv(“KEY_PASSWORD”)
and before calling your gradle assembleRelease build set your environment variables :
D:\DEV\AndroNode_tuto\Android_app>set KEYSTORE_PASSWORD=<your keystore password>
D:\DEV\AndroNode_tuto\Android_app>set KEY_PASSWORD=<your keys password>
D:\DEV\AndroNode_tuto\Android_app>gradle assembleRelease
...
...
BUILD SUCCESSFUL
Total time: 6.386 secs
Notice that you don’t need quotes or double quotes, for your environment variables, and avoid space around the no space before or after the = sign
That’s all folks !
If you :
– have any suggestions or corrections,
– ‘re stuck somewhere
– think, some parts are not detailed enough
just tell me!
Leave a comment